Synapse Analytics Workspace Lab 1 – A Step-by-Step Process
So you have decided to use Azure Synapse Analytics as your analytical platform and don’t know where to start?
This article aims to get you started by covering a few considerations before creating the Synapse Analytics workspace, a unified development environment for analytics. Review the following sections to ensure that the project is successful. The topics we will cover in this article are:
- Naming Conventions for the service
- Pricing Estimates
- Creating the Azure Synapse resource
Naming Conventions and Metadata Tagging
Naming Conventions
Assets created in the cloud are organised using Organisational and Management requirements. A well-defined naming and metadata tagging convention help to quickly locate and manage resources. The topic of naming conventions and metadata tagging will be covered in more detail in another post.
For this article, we will use the following naming convention and metadata tags.
The name convention we will follow is <resource type>-<environment>-<location>-<instance>
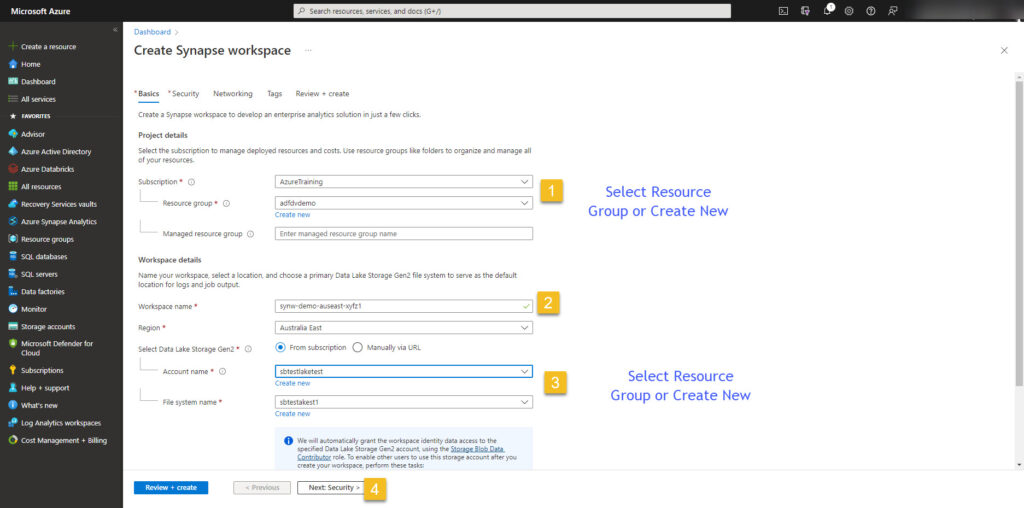
For this service, the name will be synw-demo-auseast-xyfz1.
Note: xyfz1 is a random sequence of characters to ensure uniqueness in the name.
Metadata Tags
Metadata tags usually contain information that cannot be included in the resource name. The owner and business unit are examples of information that can be stored with the tags.
This article will not set a metadata tag when creating the resource in the upcoming lab 1. However, it is usually a requirement to have these tags in production systems.
Pricing Estimates
The Azure Pricing Calculator is an online service provided by Microsoft that estimates the cost of the service running. It is highly recommended that an estimate is generated before you create this service.
As an example, the following are the estimates of my service cost.
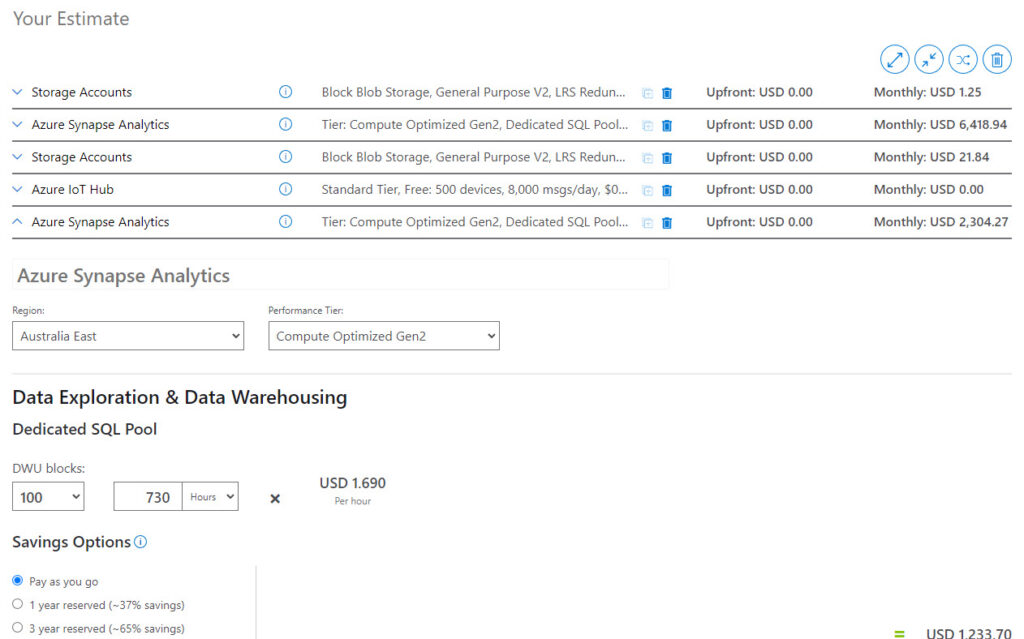
Before creating this service, ensure the estimates meet the budget.
I will cover the pricing calculator in more detail in a separate blog post.
Creating the Azure Synapse Workspace
Once you have your naming conventions and have checked the costs for Azure Synapse, follow the steps mentioned to create the Azure Synapse Analytics workspace.
- Open a Browser (Google Chrome, Microsoft Edge, Firefox)
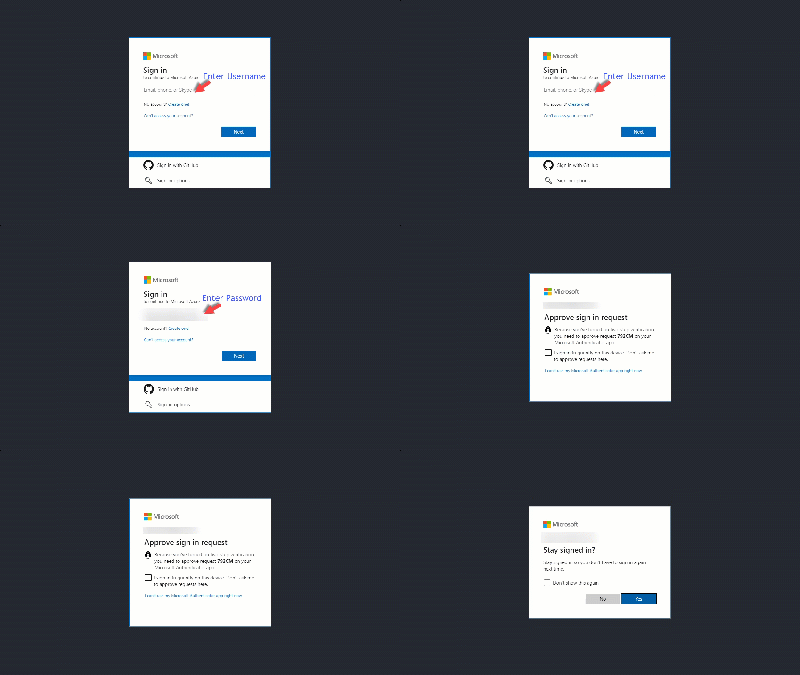
- Open the Azure Portal URL and Login
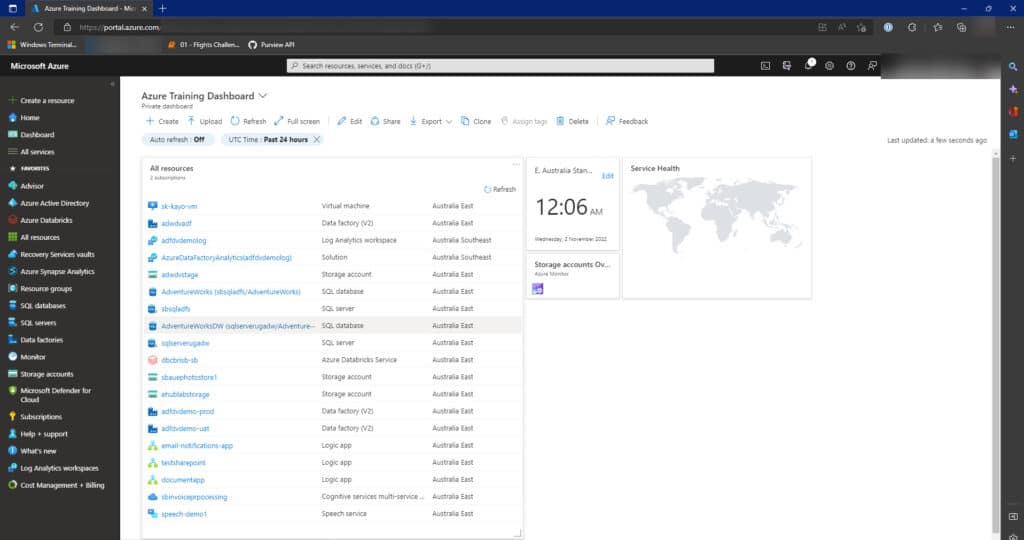
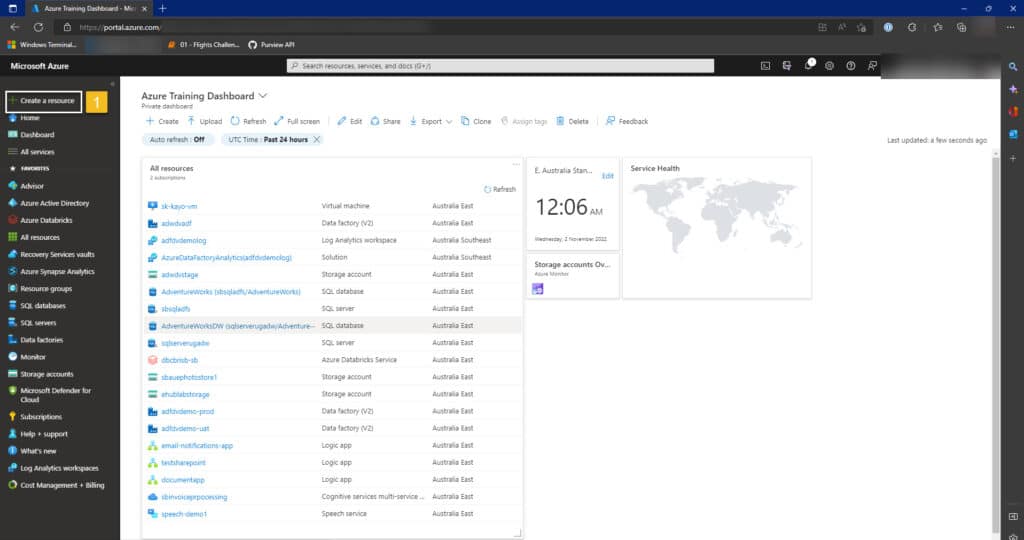
- Create a resource as shown
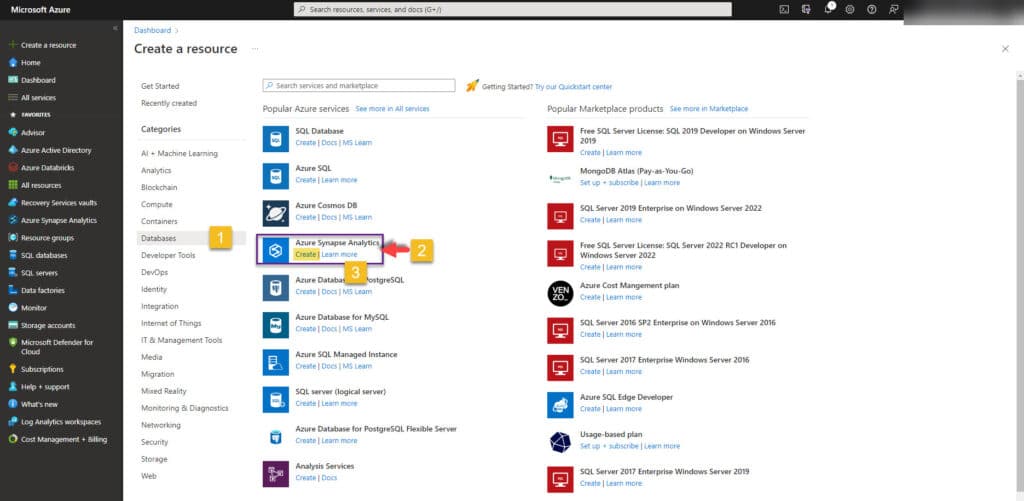
- Select Databases and Azure Synapse Analytics as shown
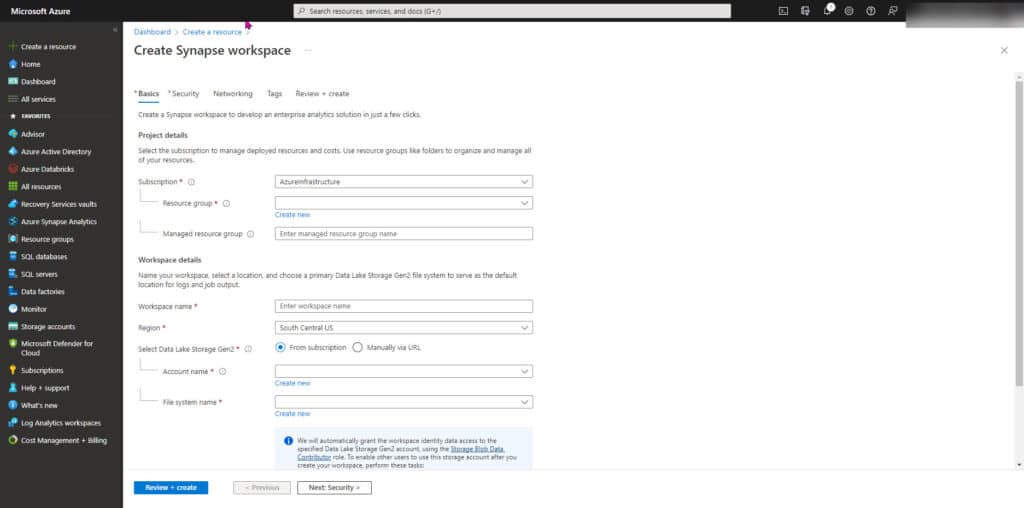
- A new screen titled Create Synapse workspace will be shown. Fill in the information requested. Use synw-demo-auseast-xyfz1 for the workspace name. Select Security
- Select the username and password. Allow access to the storage account, and leave everything else as default. Finally, click Networking.
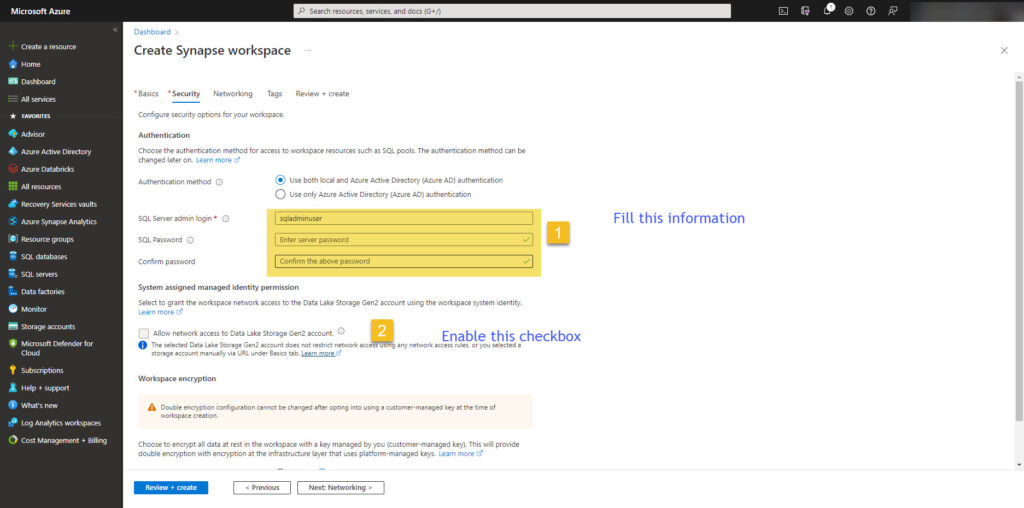
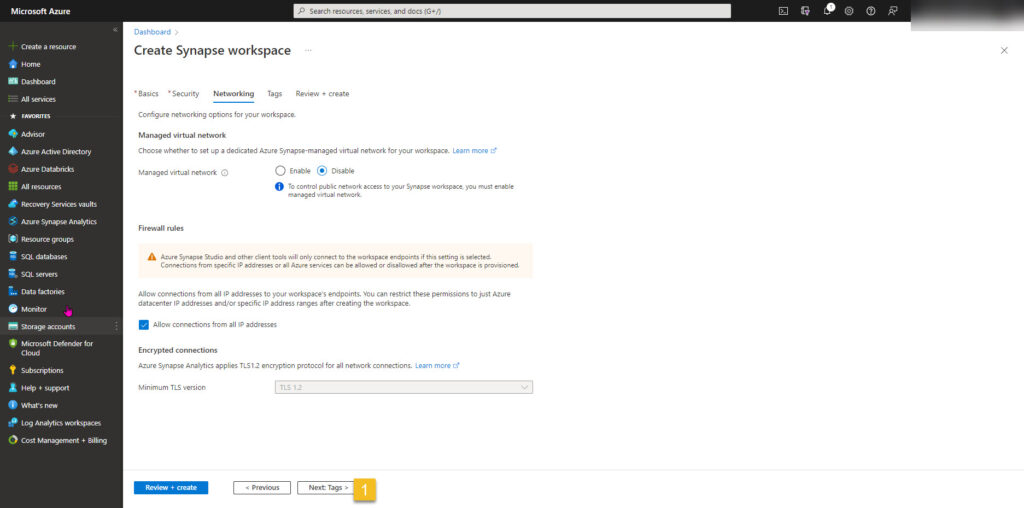
- Leave everything default and Click Tags.
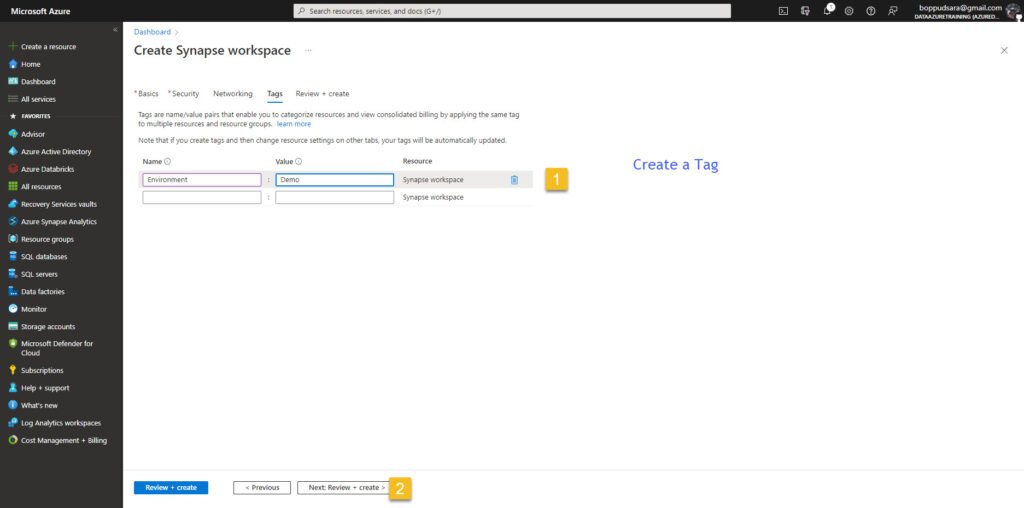
- (Optional) Create a tag as shown and then select Review and Create
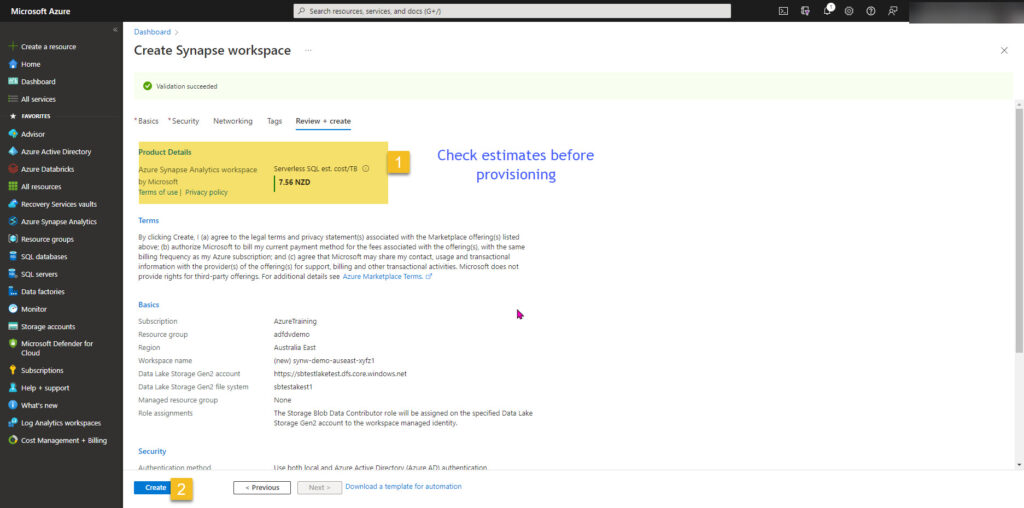
- Check the estimates and select Create
- Deployment starts as shown
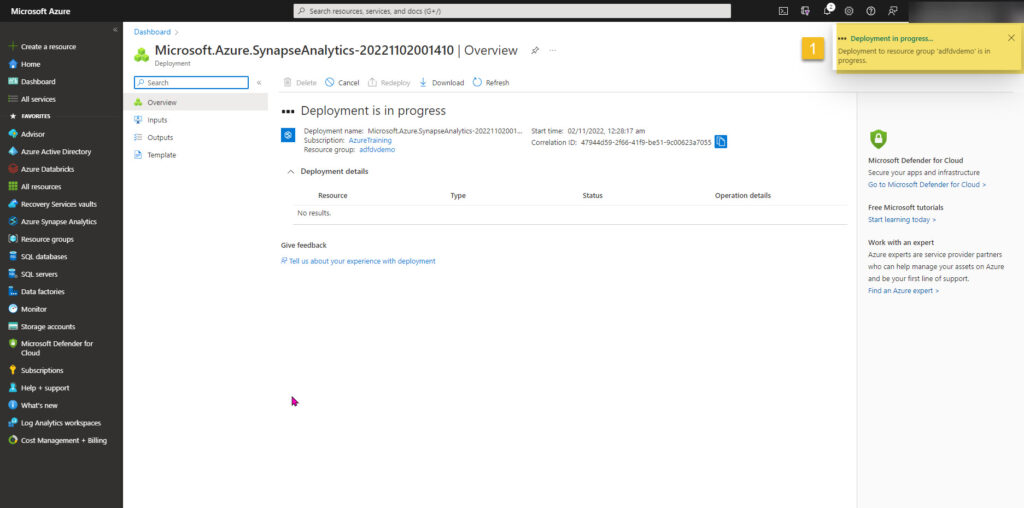
- Ensure that the deployment is successful
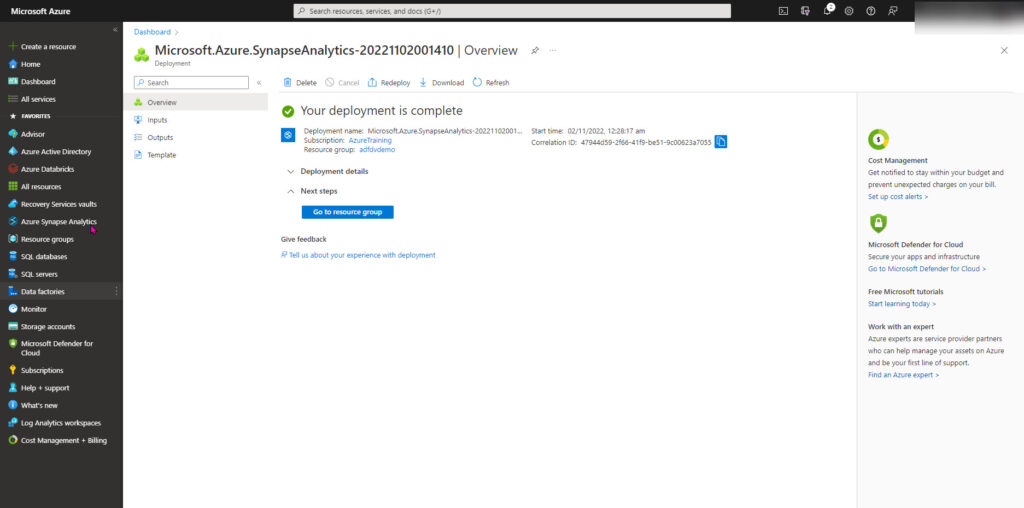
- Congratulations. The Azure Synapse resource has finally been provisioned.
Conclusion
In this post, we covered serval topics like setting a naming convention and setting metadata tags for this resource. We also briefly discussed the Azure Pricing Calculator; the same example was shown with default values for this resource.
The rest of the article is devoted to creating a new Azure Synapse workspace resource ready for use in future projects.
Next Steps
In an upcoming article, I will document further information on the Azure Synapse workspace and how to set up the various services discussed in Synapse Analytics (Part 1) – An Introduction To A Powerful Analytical Service.
The third article in this series is planned for next week, and the article will tour the new synapse analytics workspace we have created. Stay Tuned!
In the meantime, please have a look through some of my other articles from the Blog Home Page
If you have any feedback, please drop me a message, and I will respond as soon as possible.

