I had a requirement recently at a client to design a solution to ingest data from an Excel File being maintained by the client into a Data Warehouse built in the cloud using Azure Data Factory. When doing an initial analysis I noticed that an Excel connector is not provided out of the box in Azure Data Factory. This article details the design and the steps implemented in my solution to get around this problem.
In addition to my problem of ingesting Excel data into the data warehouse I had another requirement that I wanted to meet; this requirement stated that I needed to follow the Modern Data Warehouse pattern described in the Microsoft Architecture Centre.
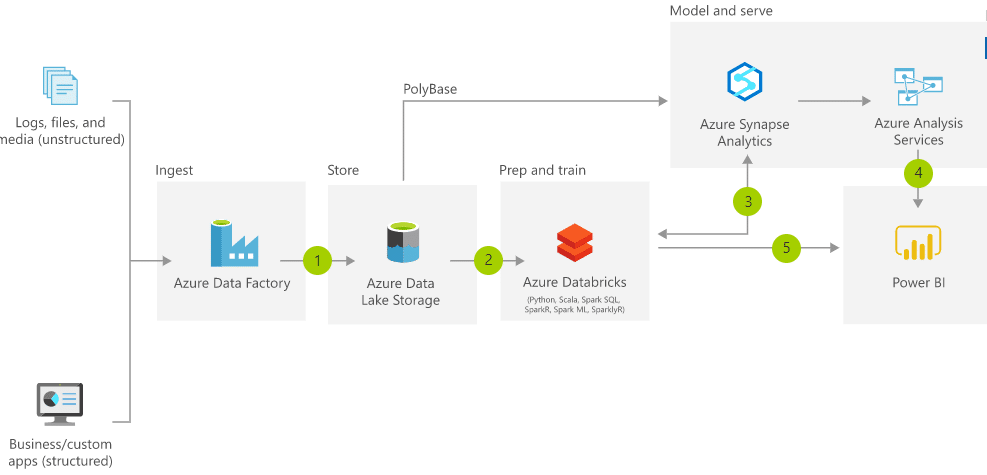
My solution uses a subset of these services, and this article only talks to getting the data from the source system (Excel) into the Data Lake (Azure Storage Gen 2) and subsequently loading the data into the data warehouse.
To verify that my solution worked I use the following resources:
In this scenario the storage layer is acting as my Gen2 data lake and the Azure SQL Database is my data warehouse. The source data was copied onto SharePoint to mimic a data file stored in an enterprise’s SharePoint/Teams Server.
To test the solution, provision these resources yourself in your account or alternatively Create your Azure free account today
This article will not be walking you through creating these resources but I will create subsequent articles to do this in the future.
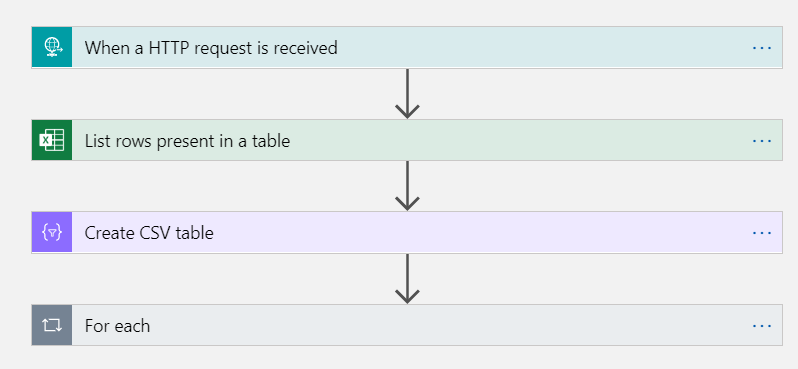
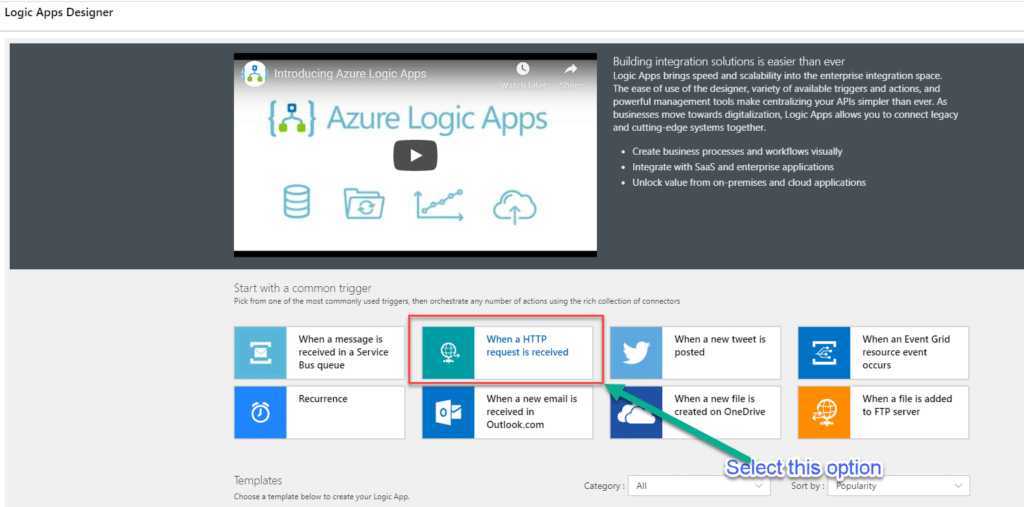
To implement the solution I used an Azure Logic App as shown here. To trigger this logic there are a number of options, but for my purposes I triggered logic using a Http trigger
Once the logic app has been provisioned on the azure portal, go to the app and you will get the following web page.
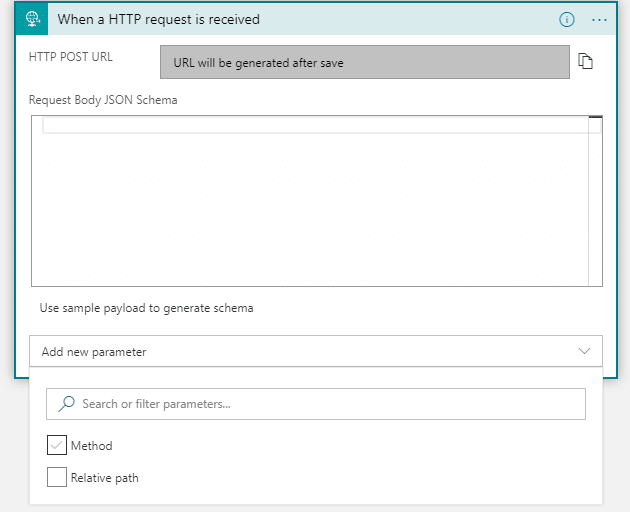
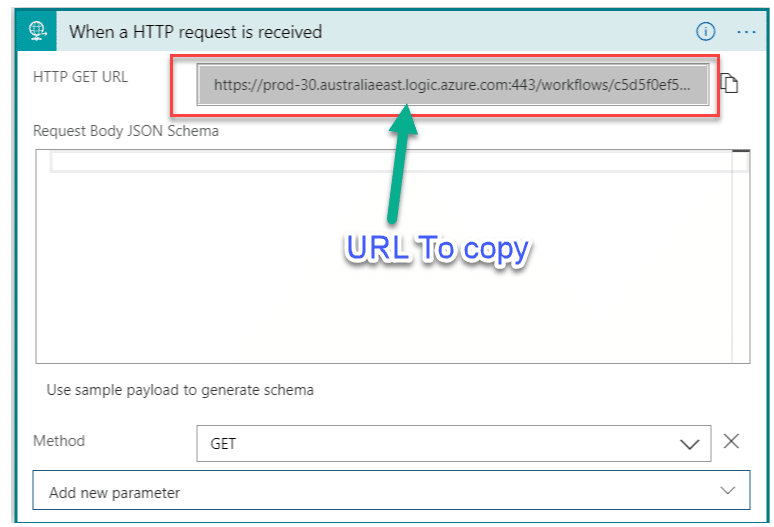
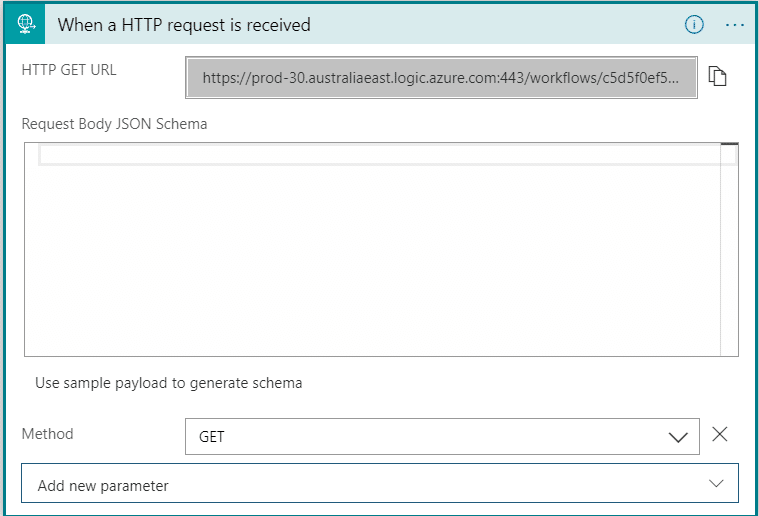
Once this has been selected you get the following task on logic app canvas, click on Add New Parameter and select the Method checkbox. This will allow you to select the type of web request you wish to submit as part of your logic app call (GET, PUSH etc.). Click Save
Click on the request again and copy the URL from the top window as shown in the screenshot.
Click New Step
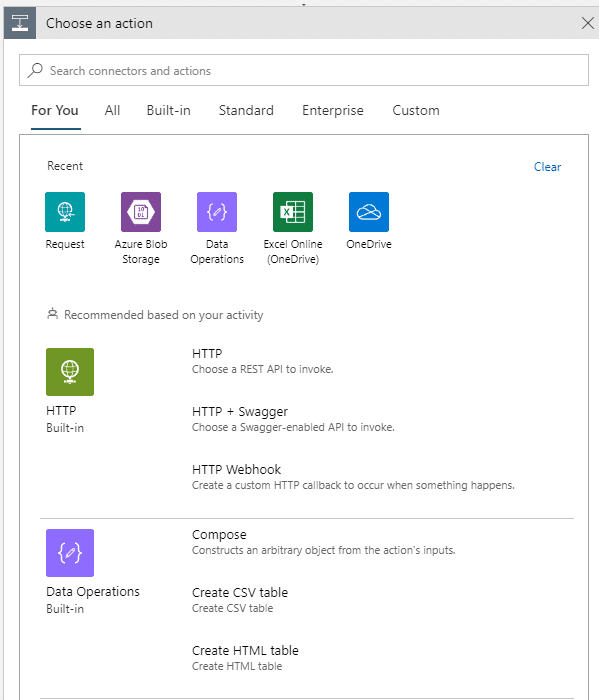
Clicking New Step will open the following window with options to chose Various actions, Search for Excel and select Excel Online (OneDrive).
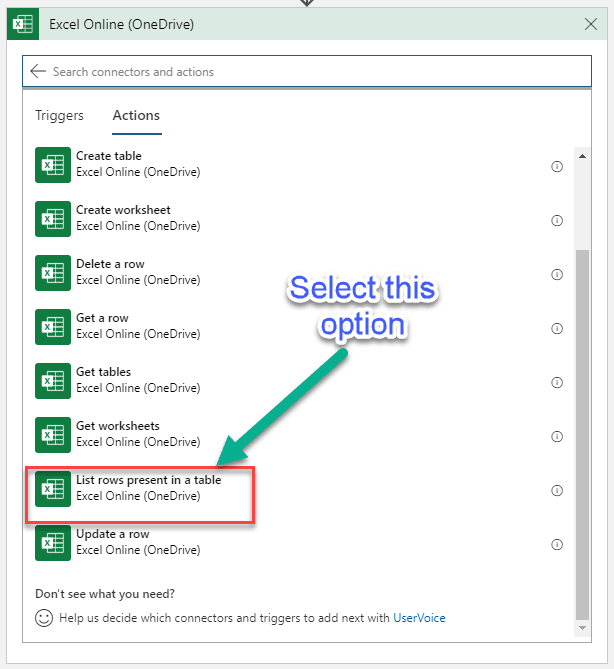
In the list of actions select the option “List rows present in a table” as shown in the screenshot.
You are then asked to sign in. Please enter your credentials to login to your SharePoint/Excel Online environment.
Once you have completed logging in, you will get then get the option to set your file location. Please note your data set in Excel needs to be converted to a named table for this to work.
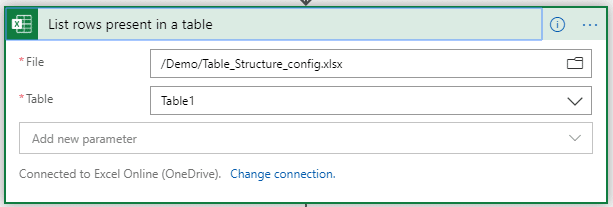

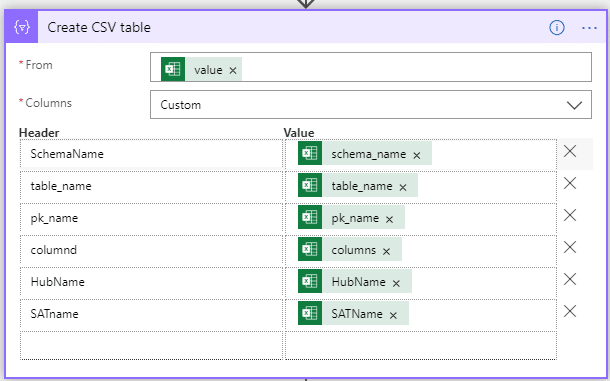
Once that is complete select New Step. Similar to above, you are asked to choose a new action. Search for Data Operations and Select Create CSV table from the List of Actions.
The Automatic columns do work to create the CSV file but there is a specific reason to use Custom in this scenario.
Using Auto creates the column odata.etag in the output but it generates an error when run through Azure Data Factory
{ "Message": "ErrorCode=InvalidTemplate, ErrorMessage=Unable to parse expression 'odata.etag': expected token 'LeftParenthesis' and actual 'Dot'." } - RunId: 856c0d37-4573-4125-ba03-79ee3e36382b Click Save and the select New Step
Similar to above, you are asked to choose a new action. Search for Blob and Select Create Blob from the List of Actions.
In the column “Select an output from the previous step column” select value from the Dynamic content as shown below.
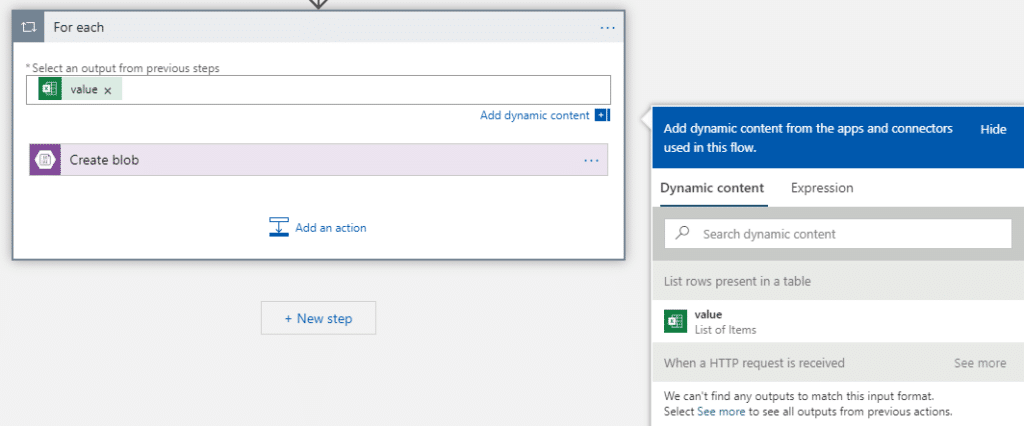
You are then asked to login to Azure using your account credentials. Do so and you will get the following screen asking for details to save the file
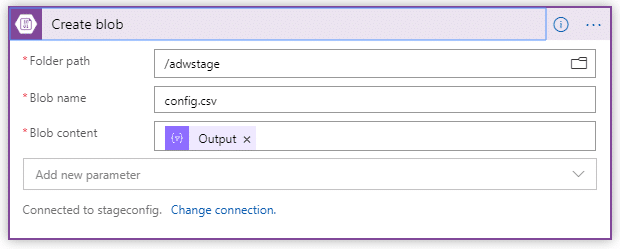
You are now complete with setting up the Logic App. The next stage is to call this Logic App using Azure Data Factory
To execute the logic app we just created, open Azure Data Factory and go to the design canvas. Once there drop a Web task on to the canvas.
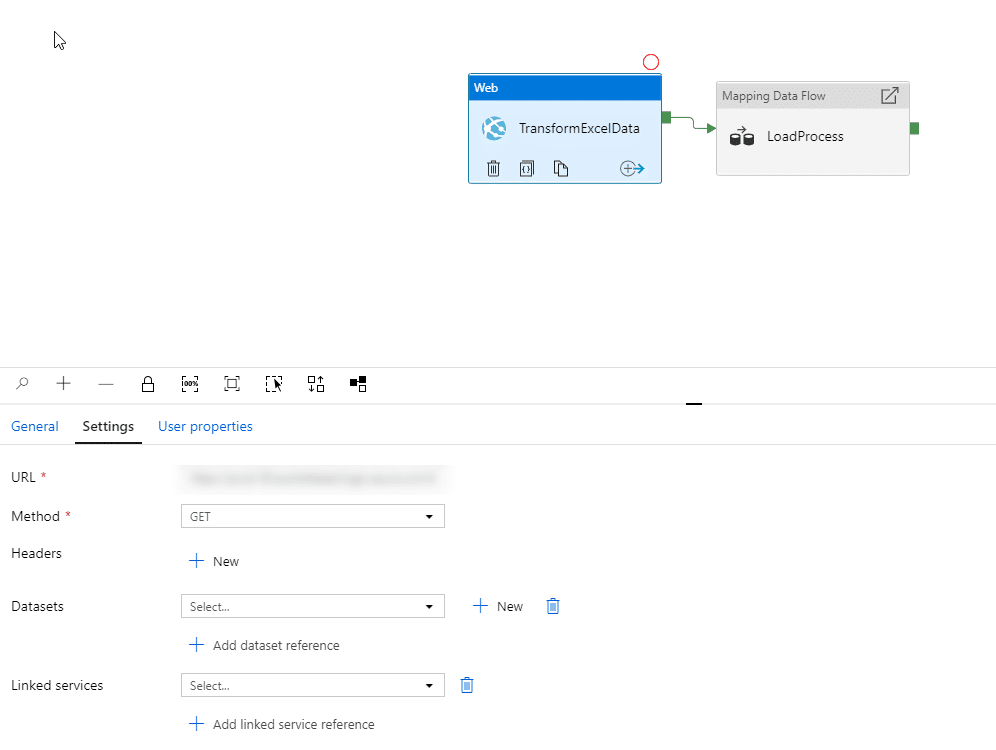
Change the URL and the method to match the URL and method in the logic app.
I have created a mapping dataflow to process the move the data from the Azure Storage Gen 2 into the Warehouse.
The solution implemented here works out very well for the scenario where you need to import Excel data from SharePoint
I am waiting on Microsoft and Azure Data Factory team to release an out of the box Excel connector so that I can transition my ELT pipelines to use them directly
Sign up with your email address to be the first to know about new publications